Hairstyles with styling waves are so varied that it can be easy to find a suitable option for long, middle or short hair. Different types of styling make it possible to emphasize any type of face, to hide flaws and easily create an individual image. Beach, Hollywood, cold - all kinds of layouts waves.

Styling methods
Often, in attempts to create waves, a curling iron, curlers, foils are taken in hands and after several hours of hard work ... curls are obtained. In order to get a beautiful hairstyle with waves, you need to follow some simple rules for curling. We analyze them separately for each method.

Curling iron is well suited to create light curves. Laying must be done well after washing and drying the head. Do not use a hairdryer before styling so that the hair is not fluffy. For laying you need a curling iron of large diameter.

How to do:
- Apply mousse for fixation.
- Part the hair pin on the back of the head.
- Screw the lower strands on the curling iron and wait 40-50 seconds.
- The resulting curls to remove, but not unwind.
- Apply the mousse again.
- Repeat similarly with the remaining strands.
- Comb and lay your fingers.

Such a perm would look great if a girl has long or medium hair.
When creating a hairstyle with the help of a foil, the strands are arranged in small rings, the final result will depend on their diameter. With very small ringlets get small curls or curls. With very large light waves. To create a hairstyle need foil and iron.

Retro style
Cold wave - hairstyle mainly on short or medium hair. It is somewhat more difficult to make it on long strands, but it is also possible. This hairstyle appeared in pre-war time of the last century. In the classic version has a side parting and strands combed on one side.

The cold wave was very popular with the generation of our grandmothers. Then the hairstyle was used as everyday. Today it is used mainly as a holiday.
At first glance it seems that making such curls is rather difficult. But after all, at the time of the appearance of hairstyles, girls had to perform it without the use of modern styling tools. Flatirons, curling irons, mousses, varnishes — all this was a great luxury, inaccessible to anyone, and some of the tools were not at all.

In the original, the cold wave does not involve the use of any hot styling tools. Make it easy enough at home.
To make a haircut, you need a styling tool, a comb with frequent teeth, hairpins, and water for wetting the strands.

Hollywood styling
This hairstyle stitched from the TV screens in the middle of the last century. She is just like a cold wave has a side parting, her hair stacked on one side. Looks good on medium and long hair.

The principles of laying the Hollywood wave are somewhat different from the cold. In order to make light Hollywood waves you need a curling iron, clamps, styling tools, a comb with large teeth.

Free style
Unlike the hairstyles described above, the beach curls do not imply a hair-to-hair styling. Beach waves create an image of lightness, ease of freedom, naturalness. Ideally, beach styling looks like its owner has recently bathed in the sea, her hair has not fully dried out, and the warm breeze has slightly disheveled it. You can make a parting, carelessly combing light curls on one side.
Beach waves - hairstyle in an informal style, ideal for a daily image.

Beach waves - hairstyle, which involves light, free bends. Long or short strands do not matter. To do it, you need an iron or hairdryer, a means for fiction. The head should not be too clean, it is better to do the hair on the second day after washing your hair.

Making a cold wave
Before you start creating hairstyles, you must prepare the hair, make it more elastic.
Prepare a decoction of flaxseed. On low heat for fifteen to twenty minutes, boil five to six teaspoons of flax seeds in one liter of water. Before the start of styling, the hair is sprinkled with a decoction of flax and combed with a comb comb-comb with rare and frequent teeth. The root zone is held with the left hand, and the right one is combed: first with rare, then with frequent teeth. Formed locks comb with frequent teeth.
Regardless of the length of the strands, the classic version of such styling is not changed, the differences lie only in the completion of styling depending on the length of the hair.
Step by Step Instructions
- Formation of the first wave. A wide strand is treated at once from two sides. They start from the side in which direction the installation will fall, otherwise the curves will be curved.
- Three to four centimeters recede from the roots and press the combed strand with the middle finger of the left hand.
- A comb with frequent teeth is inserted into the hair so that it fits tightly against the finger and is parallel to it. The captured strand is shifted to the side by one - one and a half centimeters, sliding the comb in the same plane.
- The comb is tilted to itself about 45 degrees, without taking it out of the hair. At the same time, the hair is pressed between the comb and the bend of the wave, the line of which will be between the fingers, with the index finger of the left hand.
- Comb the hair below the index finger of your left hand and proceed to the left side of the strand. Three to four centimeters recede from the base of the root zone, as well as to the right, and press with the middle finger of the left hand. A comb is inserted into the hair and moved to the right until it encounters an already formed crown (the most extreme point of the wave).
- The wave is combined by bending the pick of the comb to itself at 45 degrees.
- Formation of the second wave line. Starting from the left side of the strand, departing three or four centimeters from the first line, hold the hair with the middle finger of your left hand.
- The comb is inserted into the strand close to the finger and moved to the left.
- The wave is clamped by the index finger of the left hand, then the manipulations are repeated on the right side of the strand.
- The result is a wave bounded by the upper and lower crowns. The hairbrush moves in the direction of the wave that forms. The number of lines and waves is determined by the length of the hair,
- Formation of the last wave: the last crowns are created, and instead of combing down the length of the hair, the strand is sent in the direction in which it would be necessary to send the comb for the final wave formation.
What do you need for styling?
In the era of the appearance of hairstyles with cold waves, the choice of clips, combs and styling was extremely limited, therefore for laying you need a minimum of funds:
- clamps - ducks without teeth,
- comb with frequent teeth,
- knitting needle for final touches,
- styling products (varnish, foam) and a moisturizing spray.
Some nuances of styling
The method of laying, which is almost a hundred years old, has acquired several secrets:
- When removing the comb, you should slightly raise the hair, forming a high crowns.
- In the original version, the hairstyle suggests a side parting on either side.
- The clamps that will fix the crowns on the sides should be parallel to each other. Their optimum length is half a strand in width.
- It is possible to apply hairspray only after complete drying and removal of clips.
- The optimal number of waves: five from the side, where the number of hairs is greater and three from the opposite.
Hair styling of different lengths
For short hair, the creation of a retro-bow will not cause any difficulties, since the design is easy, and the completion does not require additional actions.
Medium-length hair is considered ideal for hairstyles based on cold waves.
Classic laying in retro style for long hair is more difficult to do.
Hairstyling and styling trends
For several seasons in a row, such hairstyles remain a trend. Cold waves can be seen at the shows of famous designers, social events, celebrations on the occasion of holidays and even in everyday bows:
- classic styling with cold waves emphasizes the hair color, giving a special gloss to the image,
- in hairstyles for long hair, cold waves are combined with tails, buns and bunches,
- A stylish combination of cool waves and futuristic accessories is one of the new trends of the season. For example, bright and discreet styling with earrings,
Elements of the style, which belongs to the beginning - the mid-twentieth century, look favorably in hairstyles in evening looks, emphasizing individuality and originality. Femininity with a touch of mystery and sensuality is embodied in a retro style, the beauty of which is also in the fact that to create a similar hairstyle according to the strength of each.
Who most often has to make a wave on the hair?

According to statistics, wave styling is the most popular hairstyle among owners of straight hair. Girls with curls, too, often use such styling to give shape to their natural curls. With outward simplicity, this style gives gloss and charm to every girl.
The principle of creating waves on the hair is simple - to give shape and fix. To create curls now use different devices - traditional curlers, curling iron or hair straightener. On their use, on the one hand, there are no difficulties, but, on the other hand, there are some secrets and tricks.
 Choose your version of oblique bangs on the photo, taking into account the type of hair and face shape.
See how to weave a French braid with step-by-step instructions in the video format here, with detailed descriptions and proven tips.
To consolidate the laying there is a large arsenal of styling tools.
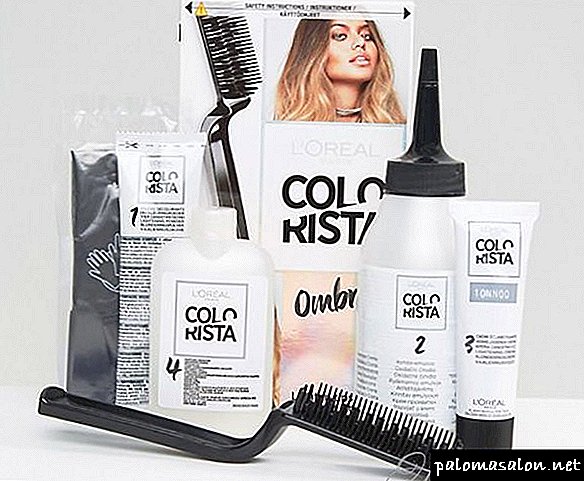
Choosing styling tools to create waves
- Mousse - suitable for hair of any length and structure, but owners of oily hair will appreciate its drying effect. Apply it on dry hair as well as on wet hair. The more money to apply, the stronger the fixation will be. At the same time you should not exceed the volume equal to the ball for tennis, otherwise the hair will look dull and dirty.
- Foam - serves not only to fix, but also to give volume. This effect is suitable for owners of thin hair. Apply to wet hair, evenly distributed comb with large teeth, and after that hair styled hair dryer. Foams should be applied less than mousse - about a chicken egg.
- Aerosol gels are a modern remedy. Its advantages are volume creation, good fixation, the possibility of combing without damaging the styling. It is applied to dry hair, styling is carried out with a thick brush.
- Lacquer - is used to finally fix the finished curls. The amount of lacquer used determines the degree of fixation - light or strong. If you use a varnish with a special sprayer, then it is easy to create a basal volume.
How to make a wave on your hair with a curler?
 To create waves fit curlers large size. Small curlers are more likely to create curls rather than beautiful waves.
- Before curling your hair rollers, wash your hair and dry it lightly. They should be wet, but not wet.
- Then evenly applied means for laying - mousse or foam.
- Begin curling with the hair on the crown, then take strands on the back of the head, and then on the sides. Strands of the same thickness are separated and wound on curlers in the same direction.
- At the end of the installation is dried using a hairdryer. Wait until the hair is completely dry.
- When the curlers are removed, then gently separate the strands with your fingers and sprinkle with varnish.
For a beautiful wave suitable curlers of different shapes and sizes, convenient to use. Someone like heated hair rollers, someone papilotki or velcro curlers.
Using curling to create waves
 Some girls are afraid to use it for curling, but modern technology has long allowed you to create styling without harm. Use a good quality curling iron with a ceramic coating and the ability to set a high enough temperature. Twist the curls for long, but at a high temperature. It destroys hair less. Be sure to use thermal protection.
Beautiful curls are obtained when using curling iron of large diameter and from wide strands.
The sequence of actions is as follows:
- The hair is washed and dried naturally or with a cold air dryer.
- Divide the hair into 2 parts, pin the top.
- Separate the strand, put on it a little mousse and wrap it around the curling. Keep it upright. Wait a minute and take off. Leave the strand to cool. So consistently wind all the lower strands.
- Loosen the top of the hair and screw it in the same way.
- When all the strands are curled and cool, you need to lower your head down, whip the hair with your hands and sprinkle with varnish for better fixation.
Video workshop on creating waves using a conical curling
Waves using ironing
It is not known who exactly had the idea to lay curls with a hair straightener, but the method became widespread. The width of the iron is usually wider than the curling iron, which means that the waves will be more voluminous.
- Separate a strand of hair as for a curling.
- Grab the strand in the middle with the ironing tongs. Wrap her tip around his hands. Do not forget to turn around its axis to wind the upper part of the strand on the plate.
- Hold the strand until it warms up and carefully remove from the iron.
- Allow to cool the strands and spray it with varnish.
- Alternately wind all strands and after cooling to separate with your fingers.
The second method of using ironing
 The hair is twisted in one or two strands and heated with a flat iron along the entire length. You need to hold the iron long enough for the hair inside the bundle to warm up. It is better to go ironing a couple of times so that your hair spins well. The harness should be dismissed only when the hair has cooled. Waves will lie differently if the tourniquet is twisted at the back of the head or above the forehead.
Laying waves with a hair dryer
The hair dryer itself does not make curls, it still needs additional accessories - a round brush, a nozzle diffuser or barrettes.
Round brush styled medium length hair. Wind the hair around the brush and blow dry. So handle the whole head.
The diffuser is used not only to add volume to the hair, but also to curl the curls. Twist all the hair into rings, secure with rubber bands and dry using a diffuser-nozzle.
Put the hair in 2 bundles, twist it into rings and fasten with hairpins, after drying the hair with a hairdryer, you will get beautiful soft waves.
Useful video will help you wave with a hair dryer:
The secrets of styling waves in retro style
 Hair styled in the style of the 20s will suit as a festive hairstyle. To create retrovoln will need:
- metal hairpins, clips,
- hair gel strong fixation
- lacquer for final fixation
- curlers
- hairbrush.
Steps to create retrovoln:
- Hair divided into oblique side parting. Separate 3 large parts: from the oblique parting through the top to the opposite ear, the second side part from the parting down behind the ear and the back with all the remaining hair.
- The back of the hair temporarily stab. Gently gel the upper part and comb.Lay the hair from the forehead and to the ear with waves, securing each bend with clips. Similarly, smear the gel and lay the second side strand. Spread the back of the gel and screw on curlers.
- When the gel is dry, remove the clips and curlers. Rear strands slightly combed. The ends of the lateral hairs left after the formation of the waves, together with the back strands, twist into a volume bundle and pin up with pins. Sprinkle hair with lacquer.
Such hairstyle will make any festive look more refined and elegant.
Video about retro waves, created according to the instructions described above.
Creating a Hollywood Wave without Secrets
Hollywood waves are the easiest way to create great styling. This hairstyle is recommended for girls with hair of the same length. On the hair with a haircut "ladder" the tips will stick in different directions and the desired effect will not work.
To create the Hollywood waves you will need: mousse for styling curls, a comb and a curling iron with a diameter of 25 mm.
- Lay the hair on the side parting.
- Separate the hair from the part to the opposite ear. This will be a “work zone”. Her twist first. Occipital hair and strands from the "non-working" side zone temporarily fasten with a barrette so that they do not interfere.

A video with step-by-step explanations will help make the Hollywood wave on the hair.
Video tutorial on how to make a wave on short hair and medium length, with step-by-step explanations:
Wet wipes
- Wet a napkin (preferably without smell, the best nursery) stretch into a flagellum.
- Wrap wet hair with large rings around the center of the napkin and tie the napkin into a bundle fixing the hair.
- So wind all your hair. Spin dried strands and comb your fingers, sprinkle with varnish.
Video instructions for creating waves at home, using napkins

The number and quality of the waves will depend on the number of braids, as well as the type of weaving. If the braid is 2, then in the middle, where the parting was, smooth hair will be obtained, and the waves will be at the ends.
The variant of weaving of the spike all over the head will make the beginning of the waves closer to the head, and hence more volume.
For maximum volume, braid 5 or more braids all over the head, moving close to the scalp and making hooks from 2 sides. This option will take care of a uniform number of waves and distribution over the entire head without even spans.
Consists of 2 steps: braid wet hair in a braid and leave overnight.
Use an aerosol gel before weaving to brush your hair in the morning and not spoil the styling.
Braid weaving options for experiments, you can see here.
Twist the waves into a bundle, wrap around the base, forming a bundle, fasten with hairpins or elastics.
Video with detailed instructions and results, what you will get after: braiding braids, twisting strands and different variations on the number
With bandage

If you don’t have anything at hand from the above, or you want to make volumetric curls as easy as possible without harm or discomfort for you and your hair, but there is only a bandage - this is excellent!
We need: slightly wet hair, dried by 95%. Your styling products, such as foam or spray. Your usual headband for the head, which does not press and keeps comfortably.
- I am combing all my hair before. Be sure to lift them slightly at the roots.
- Put the bandage over the hair and place it comfortably. You can describe this variant of putting on like a hat.
- Take 1 strand of hair near the eyes and put your fingers under the bandage from the eyes to the hairline and stick them out from under the bandages. Give your chosen strand with your second hand and stretch it under the bandage.
- The remaining hair tip is connected with the next strand and the operation is repeated. So until there is no free strand. But the second half is also better to start from the temporal zone and move to the back of the head. Make sure that the coils are as close as possible to each other.
- After all hair is wrapped, slightly lift it at the roots.
- Leave them in this condition for 2-3 hours or more (if you wish, leave for the night. Decorate this option with a hairpin with a hairpin or other accessory and in this form go to do household chores or to work
- Carefully free your hair from the dressing and disassemble them with your hands. Curls are ready!
Video how to make curls without curling and curlers, and with the help of one dressing for the hair:
How to make beach waves?
Beach waves are styling when the hair resembles the twisted and slightly curled ends of the hair. This effect can occur after visiting a shower or swimming in the sea.  To create the effect of beach waves on your hair, forget about irons, curling irons and hair curlers. We suggest you use a texturing spray or do it yourself.
Instructions for creating beach waves
Dry clean hair:
- comb,
- apply a structuring spray or similar means to create light waves,
- crinkling movements to thorough drying,
- during the final drying, do not forget to compress them, tilting the head forward to give volume,
- sprinkle finished styling with varnish.
 Read how to make a bow of hair as in the photo - beach waves + bow.
Detailed article about wedding hairstyles for guests, for long and short hair with a photo here. Having mastered the technique of creating curls on any hair, you will only have to apply it in hairstyles.
In this article, http://ovolosah.com/parikmaher/ukladki/nakrutit/kak-nakrutit-volosy-na-utyuzhki.html discusses in more detail how to wind the hair with an iron with a video explanation. Look now at all the master classes to make such curls for yourself with the help of irons.
Not found a beach wave spray in the store? Do not be upset. Make it your own hands, for this you will need:
- sea salt (1 hl),
- warm water (1 cup),
- spray bottle, any will suit, sometimes sprayers are sold separately,
- coconut oil (0.5 tsp)
- gel (1/3 tsp).
Spray Preparation Step-By-Step Video:
Mix everything in a bottle and apply, as in this video to create beach waves.
Any of these methods are suitable to try to make beautiful waves. Perhaps one of them will become a favorite and will help at any time to create a beautiful romantic styling for a date, a party, a festive evening and just for going to the beach.
In the 1950s, retro-waves were made with the help of special clamps like a krabik — they simply clamped their hair, at the expense of the teeth, they were lifted — and before drying. I regret that in my youth I threw out these clampers.
Now in specialized stores you can buy absolutely everything to create waves on the hair. Do not be upset.
Hello. I have a question for you. To create a spray for the effect of beach waves, which gel should be used?
Use the one that you have. If there is no home, I advise you to watch the video today added to the article, there is Aloe Vera gel.
A gel that does not dry hair and does not make them heavier is suitable. Strong or weak fixation is up to you.
Birth ondulation
With the advent of the twentieth century begin to occur significant changes in the fashion world. Scientific discoveries and technical progress had a great influence on them. Paul Poiret, the famous fashion designer from France, abolished the corsets. And this in those days was considered a great courage. Poiret also decided to make women's dresses a little shorter. Yes, it was not mini-dresses, only ankles were opened, but still. The shortened clothes were immediately reflected on short hair.
In France, in 1922, she saw the world the story "The Boy", written by Victor Margheritt. Immediately fashionable becomes the style of a girl-boy with an angular female figure. In the late 1920s, the “garcon” was modified into a more feminine styling: the hair is cut short and scrupulously curled, laying it in magnificent waves. This was undulation, or, as it is called today, the “Wave” hairstyle (retro).
Undulation as it is
Hairstyle retro "Waves" from time to time back into fashion. After all, laying with the shafts that frame the face, gives the lady femininity, valued at all times.
There are two methods by which you can create waves in retro style. These are hot and cold ways. This type of installation will be considered famous undulation, or the “Marseille wave”. The second name was given in honor of Marcel Grato - the creator of the piling.
The ideal hairstyle "Wave" retrostyle exactly must imitate the shape of the shaft: crest-trough and further similar alternation. Laying should be held without the use of clamps. Mr. Grato created just such a wave. But today the requirements for this hairstyle are not so strict.
"Marseilles Wave"
Retropicheskie are always at the peak of popularity. Hairstyle waves in retro style, which is called "Marseilles Wave", was relevant in the 1920s. Such styling is perfect for creating an evening classic look and will demonstrate to all the people around them the excellent taste of its owner.
To create it, it is necessary to prepare curlers with a large diameter, a frequent comb, spray-thermal protection and hairspray, a hairpin.
So, first of all it is necessary to make a side parting. Then we pin a wide strand of hair with a barrette.
We treat the whole hair with a thermoprotective spray. Screw curls in the direction of the face. It is necessary to try to make tight curls. Otherwise, the hair "Wave" (retro) will not work.
After all the hair will be twisted, they should be sprinkled with varnish, providing a suppressive fixation. Then comb the hair with a comb. The contours of the future styling will be noticeable. The tight curls gradually give way to soft waves.
The tips of fully combed hair are recommended to twist down. The last step is to fix the hairstyle with hairspray.
Cold retrofile
Retro hair "Waves" can be created by another method. For its construction, you will need to move a thin comb in front of the index and middle finger of your left hand, which indicates the direction of the wave. The resulting bend is fixed with your fingers.
Cold undulation is carried out on a thoroughly washed head. Means for laying braids are applied gradually, placing particular emphasis on the roots. Each hair from root to tip must be soaked in such a composition.
After the retainer is applied, the hair is carefully combed with a thin comb. Side parting is most suitable for cold wave creation. On the side of the head, on which there is more hair, there should be from five waves, where there are less braids, from three.
Hot waves
Consider another way to make a retro-hair "Waves" hot method. To do this, you will need necessarily hot tongs and a comb. Waves are made due to the gradual displacement of forceps from the hair roots to their tips. But the forceps at this time should change their location: under the strand and above it.
So, separate the strand braid and comb it. Hot tongs are placed near the roots so that under the strand is the surface that heats up. We hold the curl in this position for several minutes, but do not forget while combing the remaining strand of braid in the direction of the next shaft.
The next wave is created by hot tongs, the heated surface of which is already located above the strand. The remaining waves are created in the same way as the previous two.
No matter how the wave “Wave” is created, the girl with her will be irresistible!