Highlighting has long been a popular way of dyeing hair. Many do this procedure in the cabin, but the home highlighting does not look worse, but costs several times cheaper. For example, a hat for such coloring can be made by hand.
This article will tell you about what materials you can make such an accessory and how best to do it yourself at home.
Tight package
It is better to take polyethylene, since cellophane is very easily torn. It should be large in size so that it can be easily wrapped around the head and fixed as a cap. Soft material can be knotted at the back near the neck or under the chin. More dense option is fixed by an adhesive tape.
Swimming cap
Due to the fact that it is made of rubber, the cap fits tightly to the head. Holes need to be made in advance, because otherwise it will not be convenient.
It is worth noting that you need a hat for the pool, not for the shower, since the second is not made of rubber and therefore does not fit as tightly as possible to the head.
Required Tools
 When you have decided on the material for the cap (rubber or polyethylene), you need to find other necessary tools.
- Marker or marker. It is necessary to mark on the cap exactly where the holes will be. It is better to take dark colors, as they are better seen.
- Sharp tool. It can be nail scissors, awl, tweezers, etc. He needed to make holes in the cap.
Thus, materials for creating a cap, designed for self-highlighting, are easy to find in any home.
How to make the most at home?
The process of creating a homemade coloring agent is very simple and does not take more than 10 minutes. The main thing - just follow the instructions and perform all actions in order.
- We take the basis for the cap. If it is rubber, you do not need to do anything; if it is plastic, you need to cut off the necessary part, leaving the ends for the ties. We check that the cap fits tightly to the head.
- We draw with a marker crosses in places of future holes. Their number and size depends on the hairstyle that you want to end up with.
- Cut holes in the cap. This should be done as carefully as possible so as not to tear the material and not make the holes too large.
- Try on a hat. Before painting, you need to check that everything is in order, otherwise the result may not be as expected.
- Dye your hair. If everything is in order, you can proceed to staining.
Which hat is better - shop or homemade?
 Of course, to buy a hat for highlighting in the store is easier. But not everyone can afford it and can not find it in every village. For example, in a village shop there is hardly a similar device. But surely everyone has packages.
If we talk about durability, the cap of rubber is not inferior to the store. Polyethylene is not as strong, but at one time it just enough.
The most difficult thing is to carefully make holes so that they do not break and are not too big. In addition, all the holes should be the same in size, if there is no goal to make different strands.
When painting the house you need to be as careful as possible, especially with a hat from the bag. Any wrong movement can tear the material or create a slit between the holes, because of which a ridiculous stain will appear on the hair later. It is also important to ensure that the colored strands do not come into contact with the unpainted ones. Otherwise, the “drawing” will fail, and the result will be different from what you expected.
Rubber hats are suitable for reusable use. The main thing is to check the cap before each staining so that it is whole and in good condition. If something bothers you in a hat, it is better to replace it, because no one wants to risk their appearance. A hat made of a plastic bag just should not be reused. Most likely, it will already lose its shape, and it will also be difficult to fasten it tightly on the head. In addition, the cost of the package is so small that it is better to buy a new one than to suffer with the old one.
A hat for highlighting - a simple and affordable way to create a fashionable hairstyle. It is much more convenient than staining with foil, and cheaper than going to the salon. The main thing is to show patience and accuracy, and then in an hour you can make fashionable dyeing yourself out of a boring hairstyle without the help of specialists.
Cap - a necessary attribute for highlighting
In order to ensure uniform coloring at home, it is best to do highlighting through a cap. It takes less time and simplifies the procedure.
Now on sale you can find a large selection of different kits designed specifically for this type of coloring. The package includes everything that is required for self-transformation, including a disposable hat and gloves.

But what to do in the event that you did not purchase the whole set, but purchased the necessary components separately? Find gloves to not get your hands dirty, will not be a problem, but what about the hat? The boundless imagination of modern ladies coped with this problem. If you wish, you can make a cap with your own hands, and it is worth noting that it is incredibly simple and fast. There are two options for how to get out of the situation.
- If you have a hat for the pool (most often they are rubberized), it is quite possible to use it for highlighting. Make the required number of holes on the surface, through which you will stretch the strands, and that's it.
- The second option is to use a tight package. Build a cap out of it that fits your head. It will be no more difficult to use it than with a special cap for coloring. Just as in the previous case, make holes, and you can start highlighting.

We make highlights at home
To make highlighting, it is not necessary to turn to professional artists and spend a lot of money on visiting beauty salons. The technology is not as complicated as it might seem at first glance. If you look into it, each girl, if she wishes, will be able to make home coloring herself. And the result will be the same as after visiting an expensive hair salon.
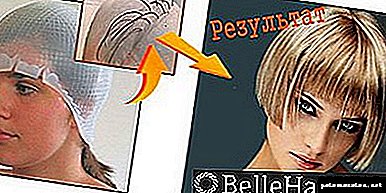
Highlighting through the cap: a step by step guide
- We take a hat (hat) and put it on his head. It is desirable that the hair was clean - so the result will be more impressive.
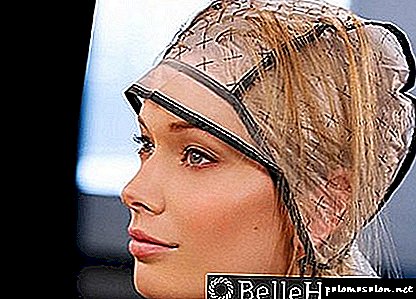
- Using the hook through the holes in front of the mirror, gently pull the hair strands. It is important to do this at the same distance so that the coloring at home is uniform.

- We prepare an oxidizing agent and coloring composition.
- Apply the resulting mixture on the elongated strands, and then cover the head with a bag so that the paint will “take” better.
- After 20-30 minutes, you can rinse your head with warm water and shampoo. The most important thing is to do it in a hat; you cannot take it off.
- Remove the cap and once again wash the curls with shampoo. So that they are not confused, do not forget to use a nourishing conditioner for hair.

- Making styling.


As you can see, highlighting at home is not so hard to do. The main thing - do not rush, and then your painting will be no worse than that of a professional master.
Highlights and useful tips
- Decide how much you want to lighten your hair. The number of strands stretched through the cap will depend on this. The more strands you paint over, the more often you will get highlighting.
- Constantly ensure that the colored part of the hair does not intersect with the unpainted. If this happens, the result will not be what I would like to receive.

- When you make a hat yourself, choose dense materials that are hard to tear.
- Do not hold the coloring composition on the curls longer than written on the package. It is important to know that the longer you do not begin to wash off the hair, the greater the difference of colored curls will be with the rest of the strands. If you do not want a strong contrast, it is enough to hold the coloring composition for 15-20 minutes, and then you need to wash it off.
- If you decide to dye your strands at home, then highlighting with a cap is the best option. Of course, it can also be done with foil, but at home such a method is not effective - the hand of a professional master is necessary.


Want to add a bright contrast to your image and transform a little? Then try highlighting at home. With the help of the cap it is very simple - even the girl who has never dyed her hair before herself can cope with it. Believe me, using the presented helpful tips and following the step-by-step instructions, you will get a pleasant result.
The advantages of highlighting through the cap
Women who seem to be too complicated to highlight with a foil choose a coloring through a cap. This method is simple, takes less time and is suitable for those who are painting at home for the first time.
This method compares favorably with traditional highlighting: the contrast of colors is more pronounced. It is inconvenient to paint the strands through the foil - the hair interferes with the work, you need to carefully wrap each strand.
How to make a hat for highlighting do it yourself
 If you do not want to spend money on a special silicone cap, make it yourself. The material will be suitable tools: a shower cap, plastic bag or food film.
To make a hairdresser's hat with an ordinary hand shower, make scissors with a dozen holes in it. The distance between them can be any, but the best option is considered 1 cm. Arrange the slots in a staggered manner - so the highlighting will look more interesting.
Instead of a shower cap, you can take the usual package. It should fit the size of the head. Cut it so that it does not interfere.
You can make a hat from several layers of food film. Wrap her head and nail scissors gently cut the holes. Also quite suitable hat for swimming in the pool of silicone.
Read how to highlight the foil. Here is a step by step instructions and useful tips.
Here is a step-by-step plan for doing root highlighting. We considered when it is needed and how to implement it in different conditions.
The owner of curly hair before you carry out the procedure, it is necessary to familiarize yourself with a few tips.
Is it possible to perform highlighting during pregnancy? Read in another publication!
Do not be discouraged, even if something does not work out for you the first time, because you can always fix a bad highlighting.
What is required for painting?
To prepare for the spinning strands with your own hands, you need to purchase a kit, which contains a special cap and hook. This hook is very convenient to wield during the procedure, as it is designed to pull out thin curls through the holes.
In addition, to dye your hair at home will require the following components:
- deep bowl or other enamelware for liquid paint,
- gloves (rubber or cellophane)
- flat brush
- a cape or an old towel that is not needed to cover the shoulders so that clothes do not get dirty
- the paint is lighter than the dyed hair by several tones.
A lightening compound containing 12% oxidizer is used for dark hair and is diluted depending on the type of hair and the shade of the dyed strands. Thin and light curls dye composition, the percentage of oxidant in which does not exceed 3-4%
How to make a homemade hat for highlighting?
You can transform your image even more budget, not spending money on the purchase of a special cap, and make it yourself. For this perfect rubber hat or cellophane. The result will be a homemade hat for dyeing at home, which will be no worse than the purchase. In the process of work, instead of a hook, you can use the tip of a comb, which you need to pull strands out of the holes.
To make such a hat, a simple cellophane is suitable if you make a piece of the required size from a package. The most important condition is to carefully cut holes into which a plastic hook can pass. These holes must be placed in a checkerboard pattern, and the diameter depends on the volume of individual strands. For thin strands, holes are made smaller.
Painting with a cap
Before proceeding to the staining technique at home, you need for convenience to arrange the necessary things on the table and work near it.
To successfully perform highlighting through a cap, it is important to consistently follow the algorithm of actions:
- A prepared cap is put on the head.
- With the help of a hook or comb, equal curls are drawn out of the cap holes.
- A lightening paint is applied to the elongated strands and is well distributed over the entire length (a special paint brush is used for this).
- Depending on the expected hair color, it will take from 15 to 45 minutes to hold the dye on the hair.
- The paint is carefully washed off, while the cap can not be removed.
- At the end of the procedure, the head is washed without a cap, using a shampoo with a neutral PH.
Oxidizer, which is contained in almost all brightening paints, adversely affects the hair structure, especially if they are thin and prone to loss. To avoid the problems associated with this, it is appropriate to apply any hair balm, for example with keratin. If there is no balm, you can use the healing balm that comes with the bleach paint kit.
If you stick to all the above tips, hair dyeing at home will pass without unpleasant consequences and as a result you will get a voluminous and expressive hairstyle.
Make a hat for highlighting do it yourself
Sometimes, when we decide to change our image, we don’t have all the necessary tools and materials at hand. Or we can buy all the components separately and just forget about something.
But a wise and creative girl will always find a way out. And if you didn’t have a hat for highlighting at the right time, and you want to make painting, we offer to make this attribute with your own hands.
But first it’s worth deciding if you can do this painting at home by yourself. Assess the length of your hair before embarking on a change.
Anyway, for long curls this method of highlighting is not recommended. Professional masters in the salons can take a risk and make coloring on the hair of medium length, but at home it will be possible to make highlighting at such a length far from all.
 The hat for highlighting is necessary so that the coloring is uniform and beautiful as a result. Plus, such a device facilitates the entire process and saves you time.
There is a rather large selection of products for sale in this area, but we want to teach you to make one of the attributes for coloring - a hat for highlighting - independently, on your own and with skillful hands!
So, for the new invention we need:
- swimming or bathing cap, which is made of rubber,
- plastic bag from the supermarket,
- plastic packing bag in which we, for example, put candies, fruit or milk in a store,
- marker or dark bright marker,
- scissors, awl, tweezers or other sharp tools.
Step by step: instructions for making at home
So, we proceed to the manufacture of a cap for highlighting, armed with a good mood and crazy hands.
- We take the material for the cap, which turned out to be in our presence at home.
- We draw future holes with a marker, marking them, for example, with crosses. Do not forget to have them in a checkerboard pattern!
- We make in the cap with the help of scissors the necessary number of holes on the surface of the marked places through which we will stretch the strands, and then paint them.
If we have a package in the materials, then it is necessary to start building a headscarf from it to fit the head and think that there are tips for tying the knot when it is on the head of the beauty.
If you are going to make highlighting frequent and small, then do not make the holes too large.
 We have to pull the strand through them, and not freely pull it out from under the cap.
Shower caps are not suitable for this procedure, as they do not fit snugly to the head.
But the hats for the pool of natural or synthetic rubber are the most optimal for such a hand-made.
The opinion of hairdressers and colorists on homemade hats is ambiguous, and many are inclined to believe that professional hats are better. Perhaps, but sometimes their value is unreasonably high.
Is it reusable?
If speak about rubber cap, it may well go off for reuse in home staining. Carefully check it, so that the cut holes do not tear and do not connect with each other, forming a cut, otherwise the paint may fall on this area and ruin the highlighting with an absurd spot.
If you performed the procedure carefully, then this should not be.
The plastic bag is the weakest and most fragile. in this respect and therefore it is unlikely to be reused, and it is not worth it. Such a penny option is not difficult to do again.
Finally, beauties
If desired, fantasy and a little dexterity make a cap for the procedure of highlighting is not difficult. And if there is no financial opportunity to buy professional quality material or simply the opportunity at the moment to visit a specialized department, then things that we always have at home will do.
And you need for this very minimal amount of tools and materials.
So do not be afraid to experiment, change, monitor the beauty and health of your hair and be always on top!
And paint with hats and make a flirty bleached strands will be able to even inexperienced in this issue girlwhich never carried out coloring of the house and independently.
Necessary accessories

To perform high-quality highlighting in your own bathroom, it is enough to prepare:
- lightening agent
- oxidizing agent,
- hair dye
- a wooden or plastic container that will be used to make the mixture,
- rubber gloves,
- brush for applying the composition,
- rinse and shampoo,
- foil or a special cap (depending on the chosen method).
Highlighting using plastic cap

The cap for highlighting allows you to get rid of unnecessary problems when performing the procedure yourself at home. This tool contains special holes, where individual strands of hair are passed. If it is not possible to purchase a finished hat, a good piece of cellophane or a swimming cap, where you need to make holes for the strands, can be a good alternative.
The hat for highlighting allows you to lighten both the bulk of the hair, and create a light effect. In the latter case, the strands should be threaded into every third to fourth hole.
After preparing the strands and preparing the clarifier according to the instructions, you can proceed directly to its application. Treat the bleach should be wet strands, covering the hair with a means in abundant amounts. In the process, colored strands should not come into contact with the rest of the hair.
When resorting to this method of lightening, the hair should be washed without removing the cap. Only after that you can remove the cap and wash the dyed hair with a balsam rinse or shampoo.
Foil Cap
 How to perform self-highlighting using foil? This method is recommended to apply when it is necessary to lighten thicker strands. Foil cap is ideal for treating extremely thick as well as long hair.
To perform the procedure, it is necessary to prepare in advance a sufficient amount of foil, cutting it into individual strips of a width of the order of 10 cm. It is desirable that the foil length be twice as long as the strand.
When preparing for highlighting, it is enough to comb the hair thoroughly, and then divide it into necessary parts. Next, you can proceed to staining. It is better to start with the processing of strands that are on the back of the head.
Under the separated strands enclosed foil and dyeing is performed. The foil sections are folded in half and the side sections of the material are folded up. It is important not to stain the remaining hair. If necessary, such a foil cap can be additionally fixed with cosmetic clips.
Depending on the desired result, you can dye your hair from 15 to 30 minutes. In conclusion, the strands are freed from the foil and thoroughly washed. After that you can wash your hair using regular shampoo.
California highlighting
 To perform the highlighting procedure in this way, you do not need a foil cap or a plastic sheath with holes. According to cosmetologists, staining with free access of air makes it possible to achieve the best result without burnt strands and distinct transitions.
For highlighting here you will need:
- bleaching composition,
- brush,
- hairbrush,
- paint tank
- gloves,
- towel.
For a start, a towel is thrown onto the shoulders. Hair should be combed by strands not more than 1.5 cm wide. Split hair into strands should be strictly along horizontal partings in a staggered manner.
Lightening composition is prepared according to the recommendations specified in the instructions. The dye is applied to the strands with smooth, unhurried movements. It is recommended to keep the brush parallel to the descending strands during application. Care must be taken that the composition does not stain the remaining areas of the hair, which, if necessary, can be covered with napkins.
Leave the strands alone for complete coloring should be about 30-40 minutes. Upon completion, it is necessary to gently wash the hair with a balm or shampoo.
As you can see, there are quite effective ways that allow you to perform independent highlighting of hair. Beauty is worth visiting for this only in the absence of experience, full confidence in their own abilities and getting a successful result. In general, using the experience of friends or relying on the method of trial and error, you can soon learn how to dye your hair with highlights.
Highlighting - is it relevant?
Highlighting, in my opinion, is always relevant and not influenced by fashion. Modern people who want to look spectacular, often resort to such a renewed image. Highlighting is a selective dyeing of strands in a color that differs radically from the main hairline, or in a couple of tones.
This procedure is carried out by experts in all hairdressing and beauty salons. If you do not have the opportunity to pay for this procedure, or for some reason you do not trust the master, you can do the painting yourself or use the help of a friend.
The best option would be to carry out highlighting through a special cap designed for this procedure.
This method is perfect for owners of long hair (by the way, the method is suitable for hair of any length).
To get the result, not inferior to the work of the master, you need to read and carefully observe the technology which will be described in detail in this article. You will also learn a lot about the highlighting procedure.
Positive and negative aspects of the procedure
The procedure for painting individual strands has a number of advantages, including:
- Unaffected by fashion, always relevant and looks spectacular.
- Perfectly hides gray hairs and whole battles.
- Suitable for any age category, having a rejuvenating effect (melirovannye hair "folds" 5-7 years of age with visual perception).
- The chemical effect of the paint does not apply to the skin and those hair that will not be colored.
- The renewal procedure can be repeated once every 3-4 months, as regrown roots do not spoil the overall look of the hairstyle.
- Hair looks more voluminous.
As with any procedure, highlighting has a number of disadvantages:
- Independently carrying out the procedure is difficult, you can not do without outside help if you want to perform it qualitatively.
- A month before the highlighting, and a month after the hair cannot be dyed, curled and bleached.
- The chemicals included in the paint, harm the structure of the hair.
- The process is laborious and time consuming, requiring the quick and accurate execution of sequential actions.
Conducting highlighting procedure
For too long hair (more than 35 cm) this method of dyeing is not suitable.
As already noted, this process is painstaking, so for the high-quality implementation of highlighting, it is necessary to have patience.
Even the one who never was engaged in a similar method of coloring can cope with it.
A cap for the procedure can be bought at a cosmetics store. It is made of silicone, rubber or polyethylene, it has a lot of holes in order to pull the strands out through them with a special hook (after it is also commercially available) and then paint them.
If it is not possible to purchase a hat and a hook, you can resort to alternative options. As a cap for highlighting, use swimming rubber (after which it cannot be used for its intended purpose) or cellophane cosmetic.
Holes are made in them in a checkerboard pattern, so that the distance between the nearest holes is 2-3 cm It is also recommended to use a crochet hook to pull the strands out. It all depends on your imagination and available items.
Preparation for highlighting
This process includes the preparation of the necessary tools and tools. We will need:
- Paint. The main and main participant in the process. The paint is chosen on the basis of the main color of hair: with light hair - use dark tones, with dark hair - on the contrary, light colors. You can choose a dye mixture for several tones lighter or darker than the basic color range of hair.
- Matter to cover the shoulders and back (barber cape, towel or a simple piece of cloth).
- Cellophane cap (or package, cut on one side). It is necessary to create a greenhouse (thermal) effect, in which dyes more actively penetrate into the structure of the curls.
- Cosmetic brush. Choose not too big, but not small. Ideal size - 2-3 cm wide.
- Utensils for the preparation of coloring mixture.
- Gloves for protecting hands (polyethylene or rubber).
- Special cap.
- Hook (if you use any other convenient tool instead, remember that it should not be made of metal, as the active components of the paint react with different metals).
- Assistant (without him anywhere).
Step-by-step instruction
Strictly follow the rules listed below. Violation of the process can lead to severe damage or loss of hair.
Stages of the procedure:
- Comb your hair well (there should be no tangled and overlapping strands).
- Put on the cap as tightly as possible. Start getting your hair through the crochet holes. Try to pull out equal in volume curls. The cap from the manufacturer has a large frequency of holes, so you can get strands through each - if you want to receive frequent highlights, through one - more rare.
- Prepare the coloring mixture in the pot.
- Stick to the staining of those strands that you got through the holes. For application, use a cosmetic brush, carefully brushing it all areas. Pay special attention to the tips.
- After application, create a greenhouse effect on the head by donning a cellophane cap (or bag) over the colored curls. This effect contributes to a more active penetration into the hair structure of dyes.
- Wait 20-25 minutes. It is not necessary to withstand more, since it will not give the best result, but only “burn” colored hair. As a result, you will receive not streaked strands, but bunches of brittle straw.
- After the time has elapsed, rinse the composition from the hair with warm water using a hypoallergenic shampoo (a children's one is perfect) For 100% flush, repeat the procedure.
- Apply to wet hair a restoring mask that will produce nourishment and repair of strands damaged during dyeing.
- Wash off the mask and allow the hair to dry naturally (without using a hair dryer, forceps, etc.).
Useful tips
- If thin strands are pulled out through the holes, the effect of highlighting will look more natural (here it is at the discretion of each).
- Having too dry and brittle hair, you should refrain from dyeing procedures, since you can aggravate existing problems with hair. Complete the process of restoring the curls through the use of nourishing masks and hair balms.
- Make sure that you are not allergic to the component composition of the coloring agent. To do this, apply a small amount of paint on your wrist and wait 10 minutes. If the skin does not turn red, and itching does not start - you do not have allergies, you can safely begin.
- Do not wash your hair for 2-3 days before the highlighting procedure, as the fatty secretions of the sebaceous glands present on the hair partially neutralize the action of aggressive substances that make up the dye.
Conclusion
If you have the desire and ability to perform the procedure at home, then perfectly follow the rules described above, and you will get the result, no worse than that of a professional master. This is especially true for owners of long strands, since on shorter hair it will be much easier to correct the highlights that did not work out. Doubt your strength - better not start, but use the service provided by hairdressers and beauty salons.
Health to you and your hair!
oxidizer (for dark hair 12%, for light hair 4-6%), gloves, brush. Highlighting through the cap: a step by step guide. We take a hat (hat) and put it on his head.
Cap for highlighting do it yourself
To be beautiful is the dream of every girl. To get closer to perfection, the fair sex attend cosmetologists and sports halls. Hair coloring is also a great way to transform the appearance, add zest to it and a few notes of originality. Highlighting has been very popular for many years.This type of coloring gives room for fantasy. The main advantage of the method is that you can dye your hair at home. However, in this case, one cannot do without such an attribute as a cap for highlighting.
How to perform highlighting through the cap
To make highlighting with a cap, you need an hour of free time. Prepare a container for the composition, paint a couple of tones lighter than the natural shade of the hair, a metal hook, a cape on the shoulders or a towel, gloves, a hat, a bag.
Perform an allergy test before using the paint, brushing with the composition of the ear. If a burning sensation occurs, stop the procedure: this is a sign that the composition does not suit you. Better choose proven and well-known manufacturers of paints, they use components that are less harmful to the hair.
Here's how to make highlighting through the cap:
- Do not wash your hair two days before the procedure. Carefully comb your hair and put on a cap so that it does not hang out.
- Using the hook, pull the strands through the slits. Choose the thickness you like.
- Prepare the coloring composition and evenly distribute it on the hair lying on the surface of the cap.
- To make the effect stronger, wrap your hair in a bag or cling film.
- Wait for the allotted time, remove the cap and evaluate the result. If it seems to you that your hair is not very bright, wait another five minutes and then wash it.
The total dwell time of the paint should not exceed 45 minutes, otherwise the curls will become brittle and hard. To eliminate the dye, use shampoo. Since the procedure harms the hair, apply an air conditioner or a restoring mask.
Features and useful tips
 Here are some things to keep in mind:
- As a result of highlighting, yellowness often appears on the hair. To eliminate it, buy a tinting balm, purple or silver shampoo.
- If you are a blonde, choose a 3% oxidizer, a brunette or a brown-haired one - the 12th oxide.
- It is not necessary to do highlights if you have recently dyed your hair with henna or did a chemical perm.
- Each manufacturer of paint in the instructions informs about the time for holding the composition: strictly follow the instructions. If you do not want the colors to contrast sharply, wash off the paint after a quarter of an hour.
- Before the procedure, think about what kind of highlighting you want to perform - visible or easy. To make a weak color, apply paint not on each strand, but after one or two.
- Choose a strong and dense material for a homemade hat. So the likelihood that it will break in the process will be lower.
- After highlighting, the tips may seem lifeless and dry, they are best cut.
- Once a week after the staining procedure, make nourishing and moisturizing hair masks. They will restore them.
- Buy a special shampoo and balm for the care of dyed hair. To keep them alive, use less hair dryer, ironing and curling. If you need to do the styling, give preference to curlers.
The process of performing highlighting in video:
To cope with highlighting at home under the force of each, especially if you use the cap. Follow the instructions, and the result will be no worse than in the cabin.
Cap - a necessary attribute for highlighting
In order to ensure uniform coloring at home, it is best to do highlighting through a cap. It takes less time and simplifies the procedure.
Now on sale you can find a large selection of different kits designed specifically for this type of coloring. The package includes everything that is required for self-transformation, including a disposable hat and gloves.
But what to do in the event that you did not purchase the whole set, but purchased the necessary components separately? Find gloves to not get your hands dirty, will not be a problem, but what about the hat? The boundless imagination of modern ladies coped with this problem. If you wish, you can make a cap with your own hands, and it is worth noting that it is incredibly simple and fast. There are two options for how to get out of the situation.
- If you have a hat for the pool (most often they are rubberized), it is quite possible to use it for highlighting. Make the required number of holes on the surface, through which you will stretch the strands, and that's it.
- The second option is to use a tight package. Build a cap out of it that fits your head. It will be no more difficult to use it than with a special cap for coloring. Just as in the previous case, make holes, and you can start highlighting.
Pin for highlighting: how to use at home
The hat for highlighting is considered the best device for painting short hair. This method is not suitable for hair with a length below the shoulders. Silicone cap not only simplifies the process of highlighting, but also allows you to make painting at home, without resorting to the services of a hairdresser.
Among the various options for hair coloring, highlighting by popularity is one of the leading ranking places. Many women prefer to use this method because the hairstyle after dyeing looks voluminous, and the appearance becomes well-groomed. Another advantage can be considered the ability to mask gray hair, because the curls of different colors visually hide gray hair. Before finding the method that is best suited for highlighting, you must first understand what kind of technique it is and whether it is difficult to do.
Highlighting is one of the dyeing techniques, as a result of which dyeing of individual strands is carried out. This is a rather complicated procedure associated with painstaking work on the hair, so the implementation requires considerable dexterity and professionalism.
At home, it is real for everyone to dye their hair. In this case, the most convenient way is to make highlights through the cap. It gives you the opportunity to perform hair coloring independently and, having changed, to make your appearance unsurpassed. If possible, it is advisable to take the help of a relative or a loved one who will be able to perform this procedure.